
How to Switch to Windows 11 Pro: A Step-by-Step Guide

Windows 11 was officially released on October 5, 2021. Many users have already experienced Microsoft’s new operating system. However, what should you do if your computer has the Home version installed, but you want to download Windows 11 Pro to take advantage of all the features in the Pro edition? We will discuss this topic today.
Step 1: Preparing Your Device
Before beginning the upgrade to Windows 11 Pro, it is necessary to complete several preparatory actions:
- Verify that your computer meets the minimum system requirements. Download and run the “PC Health Check” utility from the official Microsoft website. It will analyze your system configuration and provide a verdict on compatibility.
- If any PC components are not suitable — for example, the processor or TPM — they will need to be replaced. A list of compatible CPUs is available on the Microsoft website. The TPM module should be versioned 2.0 or higher — you can check for its presence in the BIOS.
- Ensure that there is at least 64 GB of free space on the system disk. The actual amount of required space may be larger, considering already-installed programs and files.
- Create a backup of important data — documents, photos, and videos. An external USB drive, cloud storage, or a partition on the PC different from the system partition will suffice. Although the upgrade process usually proceeds without loss, it’s better to be safe.
- Temporarily disable antivirus and other security programs — they may conflict with the installer and cause failures.
- Connect laptops to a power source and desktop PCs to a UPS. Power interruptions during installation are highly undesirable.
Now you can proceed to the next step: purchasing a license key for Windows 11 Pro.
Step 2: Downloading Installation Files
Now you can begin downloading the Windows 11 Pro distribution. The simplest and safest way to do this is through the official Microsoft website:
- Go to the Windows 11 download page: https://www.microsoft.com/software-download/windows11
- In the menu that opens, select Edition: Windows 11, Version: latest available.
- Click “Confirm” and choose the installation language (Russian is available).
- Click “Download” and wait for the ISO image to finish downloading to your PC. It is about 5 GB, so the process may take some time with a slow internet connection.
An alternative option is to use Microsoft’s proprietary utility for creating a bootable flash drive — the Media Creation Tool. A link to it is available on the same image download page. The application will download the necessary files and write them to a USB drive of at least 8 GB. The flash drive should be formatted beforehand.
Step 3: Preparing Installation Media
To upgrade from Windows 11 Home to Pro, you will need to perform a clean installation using installation media. Here's how to prepare it:
- Download the Media Creation Tool from the official Microsoft website. Run the Media Creation Tool as an administrator.
- In the window that opens, select "Create installation media". You will be prompted to select the language, edition (choose Windows 11 Pro), and system architecture (64-bit is recommended for most modern PCs).
- Choose whether to save the installation files to a USB flash drive (at least 8 GB) or as an ISO image.
If you choose a flash drive, make sure it is formatted beforehand. Wait for the Media Creation Tool to download the necessary files and create the installation media.
Step 4: Clean Installation of Windows 11 Pro
Since a direct upgrade from Windows 11 Home to Pro is not possible, you will need to perform a clean installation:
- If the installation files were written to a flash drive, insert them into the PC’s USB port and boot from this device. This may require entering the BIOS and changing the boot device priority.
- When booting from an ISO image, it needs to be mounted to a virtual drive beforehand or written to a DVD using any available disk-burning program.
- In the installer window, accept the license agreement and select the language, time, and keyboard layout. Then click “Install”.
- In the next window, you will be offered to update the current system or install a new copy. Choose the second option — ”Custom installation”.
- Select the disk and partition for Windows installation. Old partitions can be deleted. To create new ones, click “Create” and specify their size in MB.
- The image unpacking and file copying will begin. The computer will restart automatically, possibly more than once — this is normal. The process may take 20–40 minutes.
Step 5: Activating and Configuring the System
The final stage is activating the installed Windows 11 Pro:
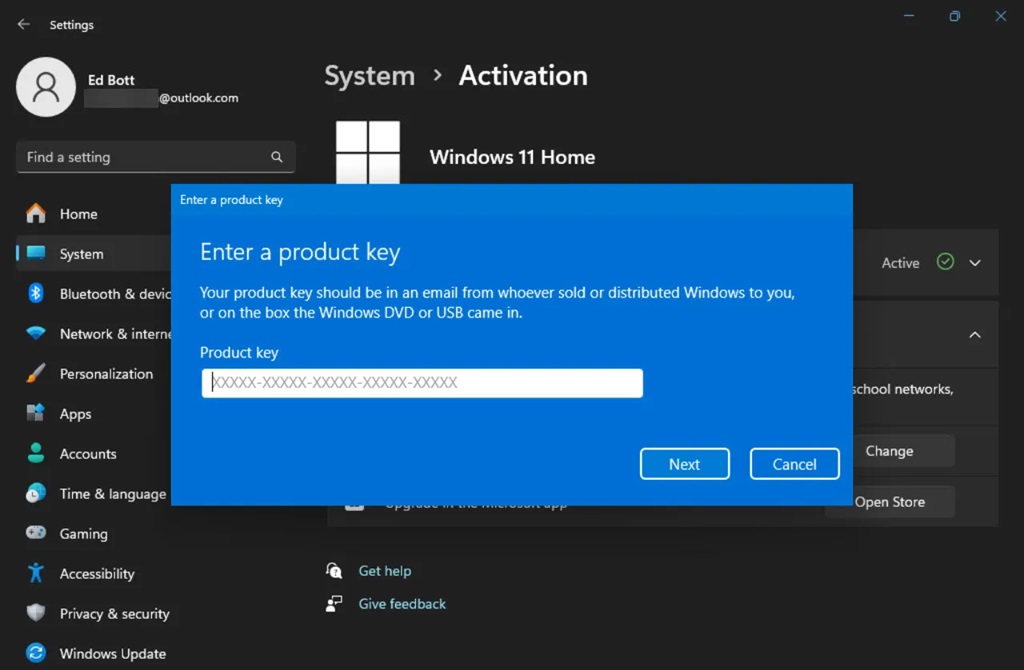
- Open Start — Settings — System — Activation. If the computer is connected to the internet, activation will occur automatically in most cases.
- If activation did not occur, click the “Change product key” button under “Windows activation information” and enter the code purchased in step 2.
- If the key is valid, Windows 11 Pro will be activated within a few seconds. Successful activation is indicated by the message “Windows is activated” in the “Activation” window.
After this, you will only need to go through the familiar process of initial Windows setup: create an account, select privacy settings, connect to Wi-Fi, and install a browser.
We hope this step-by-step guide will help you transition to the more advanced edition of Microsoft’s current operating system without problems. Good luck with the installation!